


A simple English Muffin recipe that will make you forget you're eating gluten free.
Growing up, I absolutely loved English Muffins. It was such an easy grab and go breakfast that could be as dressed up as a Egg Sandwich topped with all the fixings or as simple as some Peanut butter or a little Butter and Jam.
Regardless, English Muffins are both delicious and now can be easily prepped and stored in your kitchen for the same grab and go experience while remaining Gluten Free and including simple ingredients.


GF English Muffins
A simple English Muffin recipe that will make you forget you're eating gluten free.
Print
Pin
Rate
Servings: 8 Muffins
Equipment
- 1 Cast Iron / Skillet
Ingredients
Psyllium Husk Gel
- 20 g Whole Psyllium Husk (if using powder – not whole – use 17g)
- 360 g warm water
Yeast Mixture
- 120 g Whole Milk (warmed)
- 30 g Honey
- 10 g Active Dry Yeast
English Muffin Mixture
- 160 g Tapioca Flour
- 140 g Millet Flour
- 120 g Sorghum Flour
- 8 g Sea Salt
- 20 g Avocado Oil
- 10 g Apple Cider Vinegar
Instructions
- In a bowl, make your psyllium husk gel by mixing your warm water with the whole psyllium husks. Let it sit while you do the other steps (it will form a thick gel!)
- Next, lets activate our yeast. Warm your milk (either quickly in the microwave or on the stovetop). It should not be hot, just lukewarm (around 110*F) Add your honey to your warmed milk and mix. Then add the yeast on top. Lightly swirl and let it sit.
- In a large bowl (or in your stand mixer bowl) whisk together the dry ingredients: tapioca flour, millet flour, sorghum flour and salt. Once whisked, add in your avocado oil and apple cider vinegar.
- Next add in your formed psyllium husk gel and your activated yeast to the bowl
- Knead your dough until its smooth / all ingredients are fully incorporated (or if using a stand mixer, mix on medium until fully mixed). You might need to use a spatula to make sure all the dry patches and unmixed flour is incorporated.
- Your dough will be sticky! But avoid adding any extra flour to the mixing bowl.
- Before removing the dough from your bowl – get your baking sheet ready!Sprinkle a little cornmeal + millet flour on the base of the baking sheet (this is where the dough will rise and it will help prevent the dough from sticking to the pan).
- On your clean counter surface, add a little bit of millet flour. Drop your dough onto the flour and roll into a ball (it will be easier to work with at this point). Divide your dough into 8-even sized smaller balls.
- Take each "dough ball" and place on the prepped baking sheet. You can either form a flattened disc before you place on the sheet or place the ball on the sheet and then press down, but you will want to "flatten out" the ball so it looks like the English Muffin shape. Sprinkle the tops of your dough with the same tiny bit of cornmeal + millet flour
- The goal with gluten free baking is to keep things moist. Lightly placing plastic wrap over your baking sheet with English muffins + a towel in a warm location for an hour will help them rise without drying out. (I always place them in my oven on warm) NOTE: Sometimes I have experienced them rising too much 🙂 Not to worry, just lightly reshape the sides of your dough with your hands and move on to the baking step.
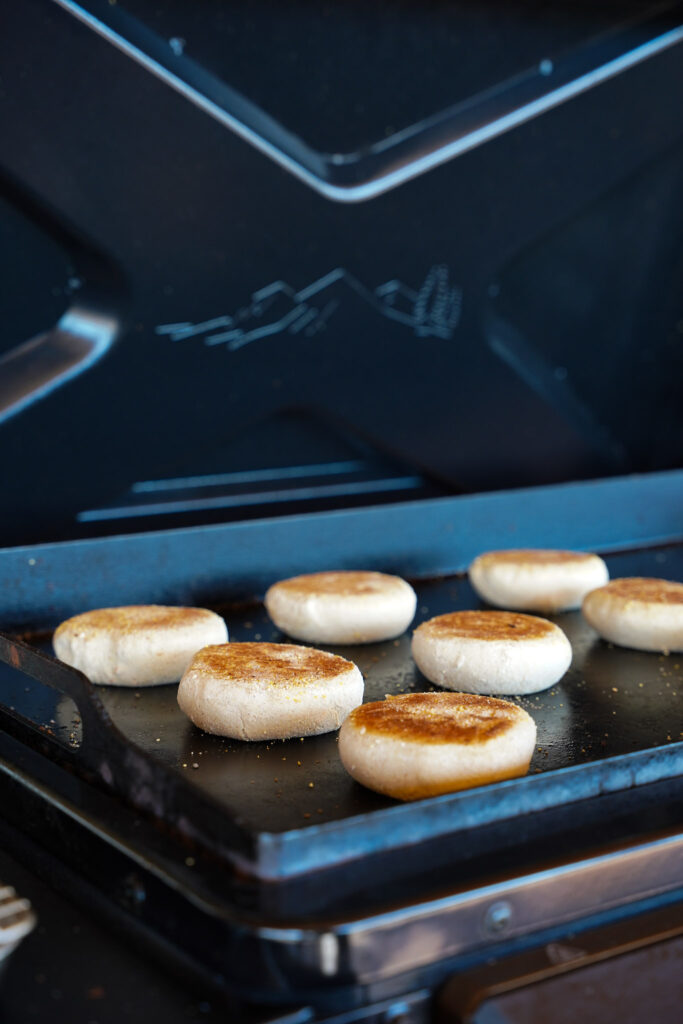
- Pre-heat your cast iron skillet (I prefer to use our griddle just for time BUT if you don't have one, it really is okay!!) Heat on low. Once ready, add in as many English muffins you can fit where they aren't touching. Cook for 12 min on each side. They should have a deep golden brown color when you flip it over. NOTE: You might think it isn't enough time, but I promise you, it is enough time for 8 English Muffins. If you edit the size / amount, then I can't keep my promise 🙂
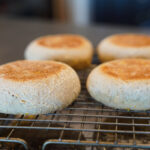
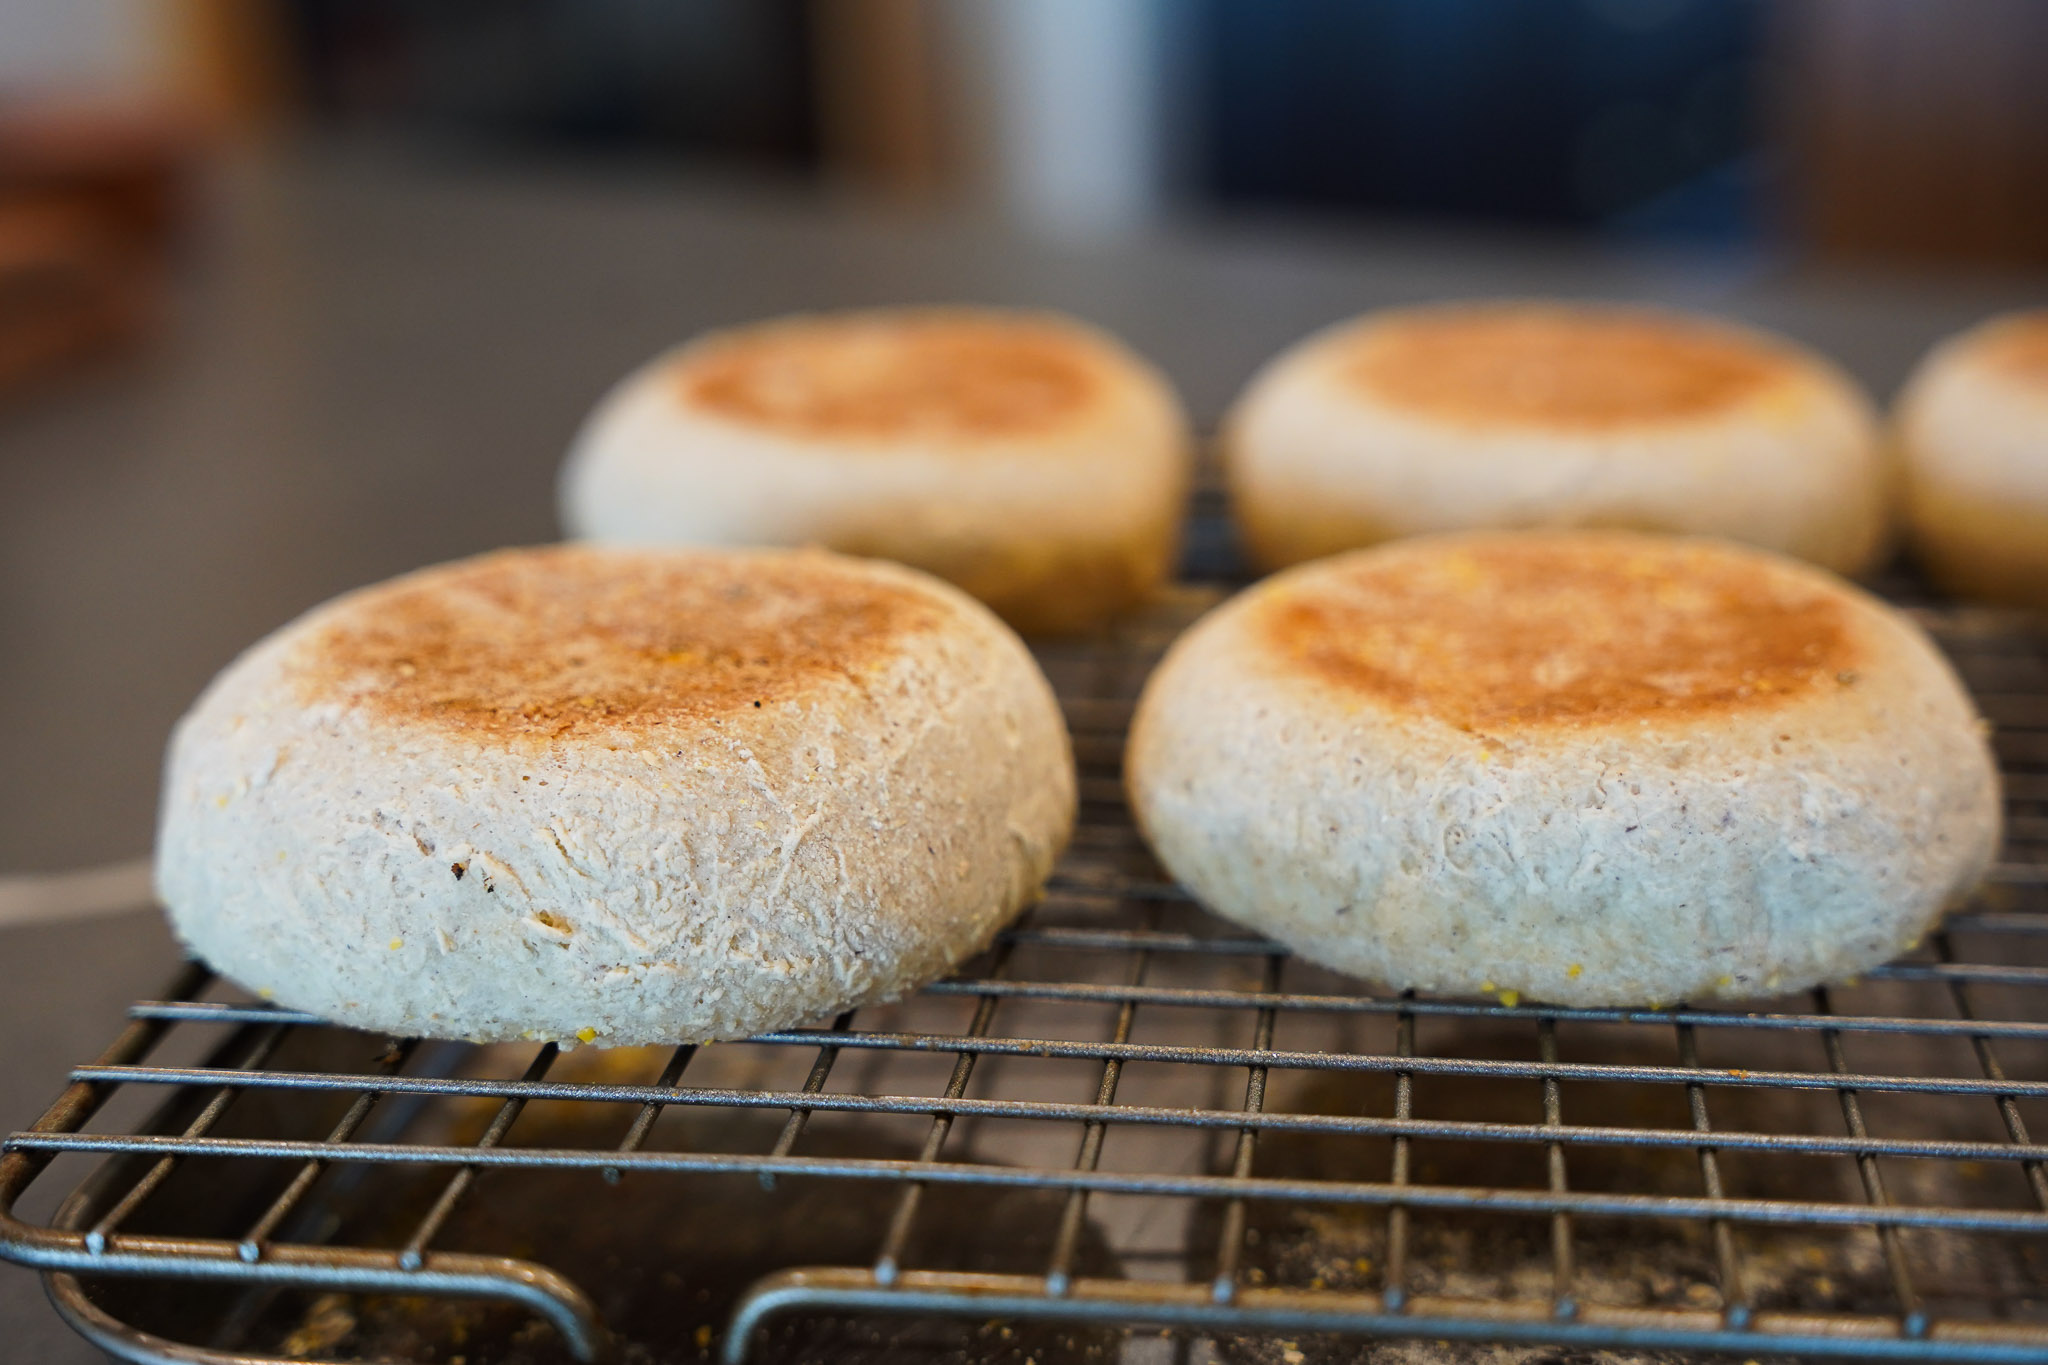
- Transfer your fully cooked English Muffins to a wire rack to cool completely. They will need the time to fully cool before you cut into them otherwise they will not seem fully cooked as they will be sticky.
- Store in either a ziplock bag or container room temperature for 3ish days. We love toasting before making into breakfast egg sandwiches or topping with butter and jam!


Ok. These muffins seem delicious and reading this recipe made me hungry! I am not sure it is one of my favorite dishes though. How do you eat them?
Xoxox
seryfashion.wordpress.com